Friday, December 26, 2014

Technology Sleeves

I hope you've had a wonderful Christmas! I really love the holidays- Thanksgiving, Christmas, New Years...it's such a festive and happy time to enjoy cooking, family, and gift-giving.  Gifts were a bit simple this year due to the reduced budget- turns out moving across the country and going down to one salary is hard on the finances! But regardless, we had a lovely holiday.  Made great food and enjoyed several video chats with family across the country.

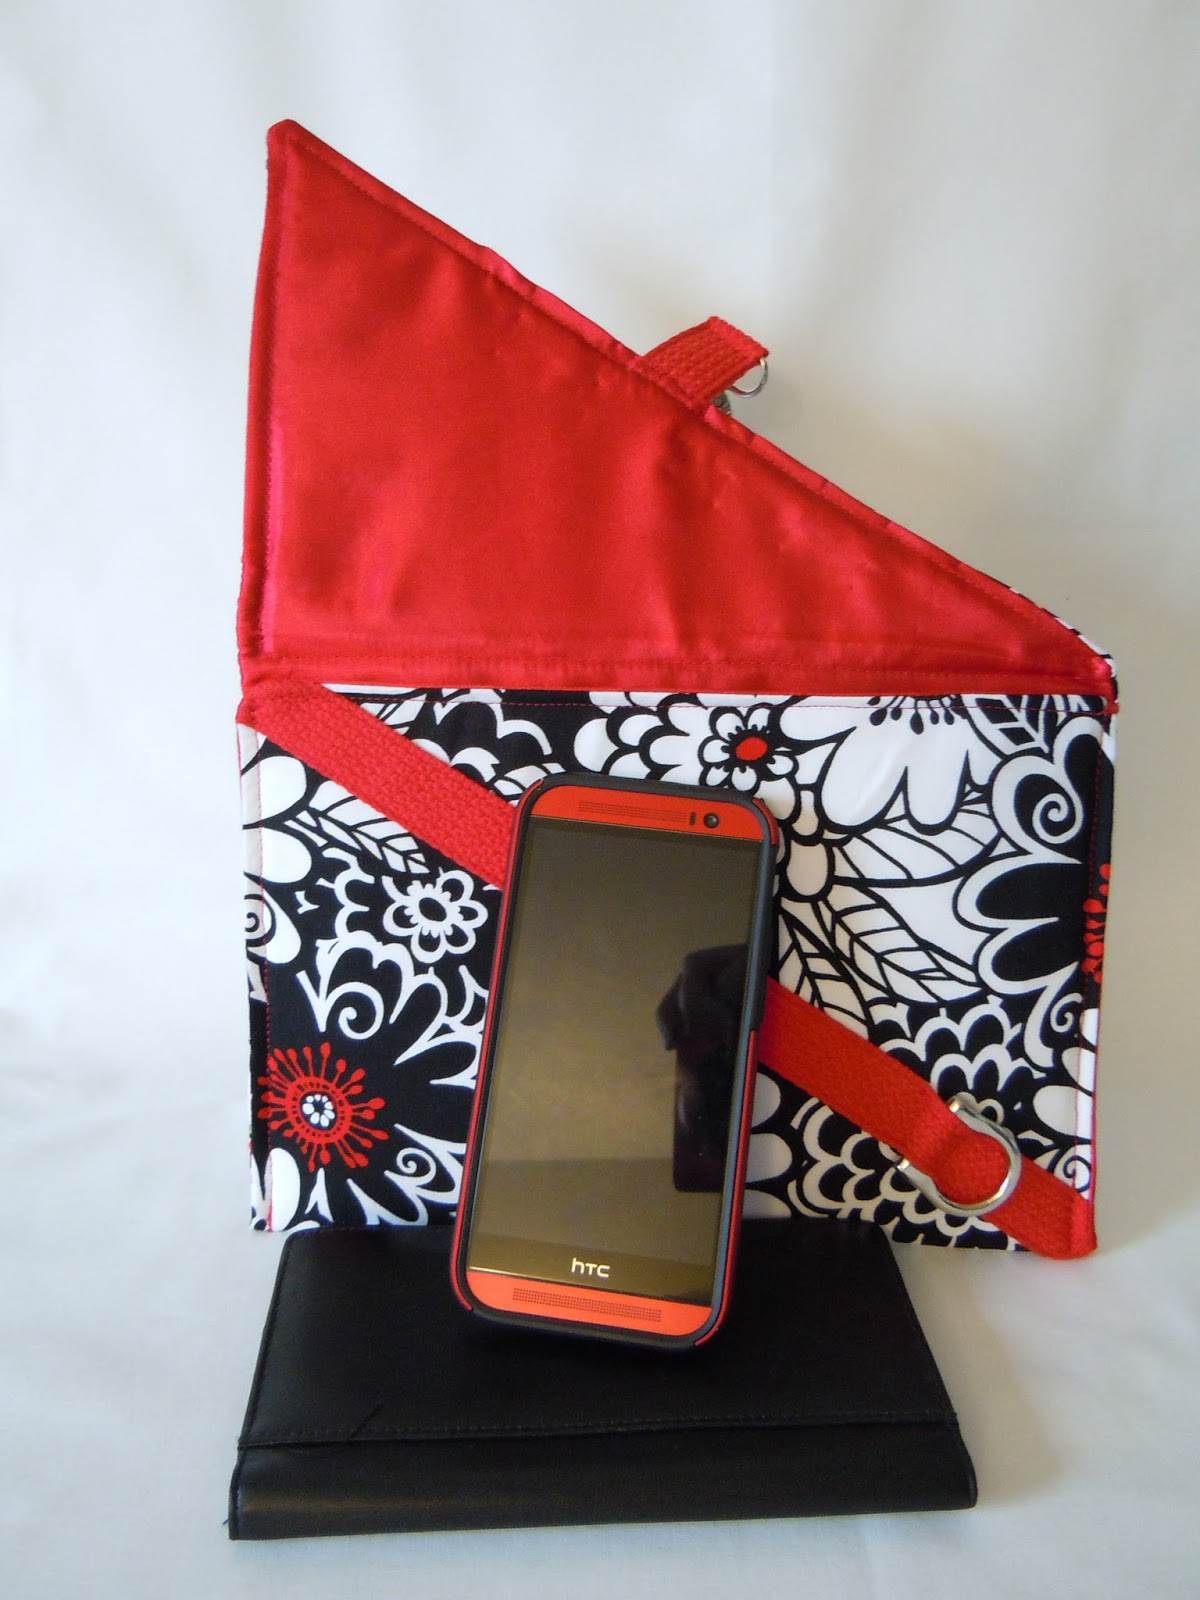
Christmas Day was a relaxed affair at our house.  Dan set up some of his presents while I devised a technology sleeve to protect my Surface Pro 3 during our travel back to Omaha next week. (As a side note, the Surface Pro 3 is an amazingly wonderful machine for graduate school!  Not sure if I've ever loved a piece of technology this much.  The iPad, though a great entertainment device, is a royal pain for any serious work.) I used left over scraps from a pleather bag I made last year,1/2 yd. of batik, 1/2 yd. satin suit lining, fusible fleece, and a button.  The result was visually pleasing...but practically, something of a failure. You'll notice in the picture that's a iPad sliding into the sleeve.  Yup- made it too small by about 1/2".  Such is my life some days!  In talking about the project with a friend, she insisted that I need to feature this first iteration to prove that I make mistakes in my creations.  To which I say, of course I make mistakes!  Who says I don't?  A perusal of previous entries demonstrates that amply, I think.  Crystal zippers come to mind immediately...

Helpful?
But this has gotten me thinking about the audience for this blog.  I've never really planned who would read this and merely enjoyed having a site to direct interested parties to view in order to see what I make.  But if you're not an experienced sewer to start with, there is little value in viewing my projects that aren't for sale. I can include my "plans" for the works, but again, they will not make much sense to many viewers, I'm guessing.  To be honest, they sometimes don't make sense to me later!  Instead of offering specific plans for each and every object I make, I would instead like to teach a reader how to make their own creations. (Shocking, right?  A teacher wants to teach...)  To that end, look for future posts about specific quilting/ sewing topics that are more of a DIY approach.  I would love to have comments about what you'd like to see though!  Zippers a nightmare for you?  How about those hidden magnets I like so much?  How to use your zipper foot?  What's the difference between the feet on a sewing machine?  How do you complete a handbag with no unfinished seams?  What are the ways of closing a handbag? These are all questions I've set out over time to answer for myself in order to make bags and projects I would actually use.  Perhaps I can help!


Sadly, Dan has to work today, so I've taken up residence in my office/sewing room.  Besides laundry, the day has been dedicated to improving the technology sleeve I messed up yesterday.  With the remainder of the pieces left over from yesterday, I managed to produce a sleeve that actually fit the Surface- thank goodness!  Of course, only at the very end did I realize I don't have an appropriate button to finish it with.  Sigh.  This is what happens when I get in whirlwind.  I guess this gives me an excuse to go out to the craft stores in Philly for the first time!  (See- there's a question in an of itself!  How can you finish a bag and still add a button later?  Who knows if you actually want that answered though- you could be saying, "duh!" to me right now.)  I would love to hear from you!


Wednesday, December 17, 2014

Diagonal Clutch

The Duo
For months I've been tossing around a mental image of a clutch that had a flap in a strong diagonal.  As I continue to work out the most successful presentation of this, you'll likely see a few clutches.  These two works are largely works of experimentation and they still need some work for perfectionist me! 

That stupid eyelet...
Interior has one simple, long pocket for separating the cellphone
In both versions, I envisioned holding onto the clutch with a wrist strap fed through an eyelet set into a corner.  Turns out the eyelet you can buy at places like JoAnn's are ridiculous.  This level of product fail hasn't been seen since the terrible crystal zipper fail of 2011. Though that eyelet looks secure, trust me, it's not.  Also tackled in that first version were the traditional magnets available in craft and quilting stores.  As I've written before, I am not a fan of these magnets.  Without substantial reinforcing, they tear out of bags very easily- ruining something you've spent a lot of time and love building.  Once I discovered the beauty of the hidden magnets housed within plastic, I've never bothered to fuss with these old-school models.  But I have a pile of them in my supply box and because I knew the support material in these clutches could support the magnets, I used them.  While I am happy with the look they provide, I am still frustrated by their very fussy placing.  Even 1 cm off and you have a gap in the front flap- which you can see. 

I'm a bit happier with the second version, in which I did away with magnets altogether. Instead, I used some strapping material and hardware also lurking around the project box.  I'm not going to punch a hole in this model until I can procure some quality eyelets. While this closure allows for more items to be stuffed inside the clutch, the bottom corner tends to flip up...sigh.  

Back to the drawing board!


Second version- with wallet, phone, keys inside


Tuesday, December 16, 2014

Life Balance

In a continuing theme..  It's the end of the year I have no posts to show for it.  Sigh. This blog began in response to changes in my life- moving from home to Nebraska for a set of jobs that would allow me to use my Masters and begin life as a pseudo-adult.   I found that I really enjoy the creation of new projects and that I can really accomplish whatever I imagine (with dedication and creativity)- an amazing revelation, really!  And that life became fuller and deeper, with new friends being made and finding my fiance.  Oh yes- update! Engaged as of late June  :)


I left you all with thoughts about grad school impacting sewing time and I was right to suspect the next year would be impacted.   As I write to you right now, I am officially a PhD candidate!!  Since the first class I taught at a TA in my Master's program, I've known teaching feeds my soul.  While teaching as an adjunct for the last couple of years has answered that desire in an abstract way, the frustrations of that life are beyond bearing.  (I will limit myself to saying that there are several really excellent articles on the condition adjuncts endure- Google it!  It's a deplorable place to leave education in.)  So thrilled to have been accepted into a great program that will enable me to reach for those dreams of college teaching!


Of course, this necessitated another move.  Sigh.  So tired of moving.  Nebraska was at least a familiar location for me and family was nearby if I needed them but this move to the East Coast has been another level of work. I am infinitely blessed to have my fiance with me this time around-- he makes everything bearable.  Really, I don't think I could do any of this without his love and never-ending support.  Everyday we're faced with how much being an adult sucks- seriously, why did we want this so much as kids?!- yet we're having a blast exploring this side of the country we've never been to before. Sooo different from the West or Midwest, let me tell you.

This all means that I spend most of my time in classes, behind a book, or in front of a classroom again.  However, I notice a void in my life that sewing fills and I'm determined to find the balance between being an awesome student and a creative individual!  This is, of course, in addition to planning a wedding from a distance.  And being a first-time aunt!    Life is full and wonderful- I intend to keep enjoying it at every moment!


Saturday, January 4, 2014

2013? What happened there?!

As always happens at the end of the year, it's time to take stock of life, accomplishments, goals, and hope for the future.  A few years ago, as we headed into 2012, I made a New Year's resolution to be better about posting in the blog.  And I was....for 2012.  I haven't made a single post in 2013.  Why?  To make a long story short, life happened. I met the love of my life, expanded my jobs, got in a car accident, got a new car, reapplied for grad school (need that PhD!), traveled the country, and moved in with said love. I cannot regret anything that happened in 2013, because it was one of the best years of my life.  There's an expression in my family that seems appropriate at the moment- I am as happy as a clam!  (How do we know that clams are happy, by the way?)

Anyway, free time this last year was a premium.  I finished several bags and one quilt, but barely remembered to take pictures of them at all. Every weekend saw a family event, a concert, a football game, a party, or commitment, which makes crafting time very difficult to come by.  But for the first time in months and months, I have no commitments on the horizon!  Yahooooo! You have no idea how weird and wonderful that feels-I haven't had free weekends in recent memory.  I sense some quilting time coming soon...  Maybe.

In the meantime, let's consider what I did actually get done in 2013!

Zip wallets for my wonderful neighbor/Italian tour guide

Judy Niemeyer quilt with my mother

It gets more complicated yet!

Japanese Garden in Portland, OR

Henry Doorly Zoo in Omaha- I LOVE GIRAFFES!

That's one bag.  Not kidding.

Tokyo Subway Quilt- 1.5" squares = Nightmare!

A wool pillow to remind myself...


Lunch bag for my brother

One of the most frustrating bags that exists...someday I'll admit to the horror of this bag.

Ok, so I guess I've done more than I thought.  Depending on how this grad school plan works out, I don't know what else I'll be sewing soon.  Thanks for bearing with me!


Tuesday, October 9, 2012

Halloween Fever

For those unaware- I love this time of year.  In the previous post I outlined the comfort to be found in jeans and sweatshirts and the simple pleasure of crunching a good leaf.  But underlying all these idyllic comforts are the magnificent trio of holidays that round out the end of the year: Halloween, Thanksgiving, and Christmas.  I love them all!  Cooking, decorating, and shopping for the elements of these holidays cheer me during these shorter and shorter days.

And yet, I have very few decorations for Halloween.  These two have been my only addition for the last four years!  Meet Ghosteo and Ghoulia- so named by TY, not me.  I do adore them...

Given my recent interest in wall hangings, I decided to indulge in a bit of Halloween fun via fabric.

I started by hunting the internet for Halloween clip art that I thought would be cute together.  After sketching out a rough plan on a piece of paper, I set about transferring these doodles onto fusible web and from there, onto scrap fabric from the stash.  I sewed everything down with decorative stitches from the machine and in a week of evenings, it was finished!


My first homemade Halloween decoration!  And you want to know my favorite part?

The little creepy mansion and it's neighborhood bats.  :)

Sunday, October 7, 2012

Autumn Love

Another cold day in eastern Nebraska- it's so lovely! There's nothing like jeans, sweatshirts, boots, hot chocolate, and crunchy leaves- I love Fall!  Perhaps this is why I undertook my first somewhat "artsy" wall hanging...watch it as it grows!


There are things I would have done differently- a better background development, for instance.  But overall, I like it.  :)  Stay tuned for the Halloween and Christmas ones!  (Yes, I'm on a kick...)

Saturday, October 6, 2012

It's all pink!

Well, the black bag with crystal zippers fared fairly well during my endurance test with it...  Pros:  the size was nice and the front pocket arrangement was handy.  Cons: the strap was flimsy- mounting an adjustable strap at each end was not a good idea.  So back to the drawing board! Using the same measurements, I've created the 2.0 version.


A return to the double strap that goes over one shoulder works much better to balance the weight load a bag this size can sometimes carry.   I do think that such a large expanse of fabric on the front is rather boring, so I added the little decorative belting for some visual interest. I'm not entirely sure of the name of the fabric I used to make this- it was the left over fuzzy bits from this blanket project:

I am happy to report that both projects used no new material- I've had the fuzzy stuff for well over five years- I figured it was time to finally get it out of my stash!  The blanket is killer!  It drapes perfectly and between the fuzzy stuff, the batting, and minky, it is sooo warm and comfy! Pull this over you and it's instant nap time.

Now, I know what some of you are thinking- minky?!  Isn't that only for children's blankets?  I say no- adults like fuzzy and soft as well.  The only real difficulty of this project was the scale.  The blanket measures 60 x 72!  Working with minky on a machine is not easy; I ended up tacking the layers together every five inches or so with multiple zigzags.  It is nearly impossible to  actually quilt any kind of design into a material like minky.  To finish it all off, I simply bought silk blanket binding.  Viola!

I've kind of burnt myself out on handbags for the moment...big shock, I know.  I'm not sure what prompted me to start this next project, in all honesty.  I've never done any wall hangings before that were not simply miniature quilts.